
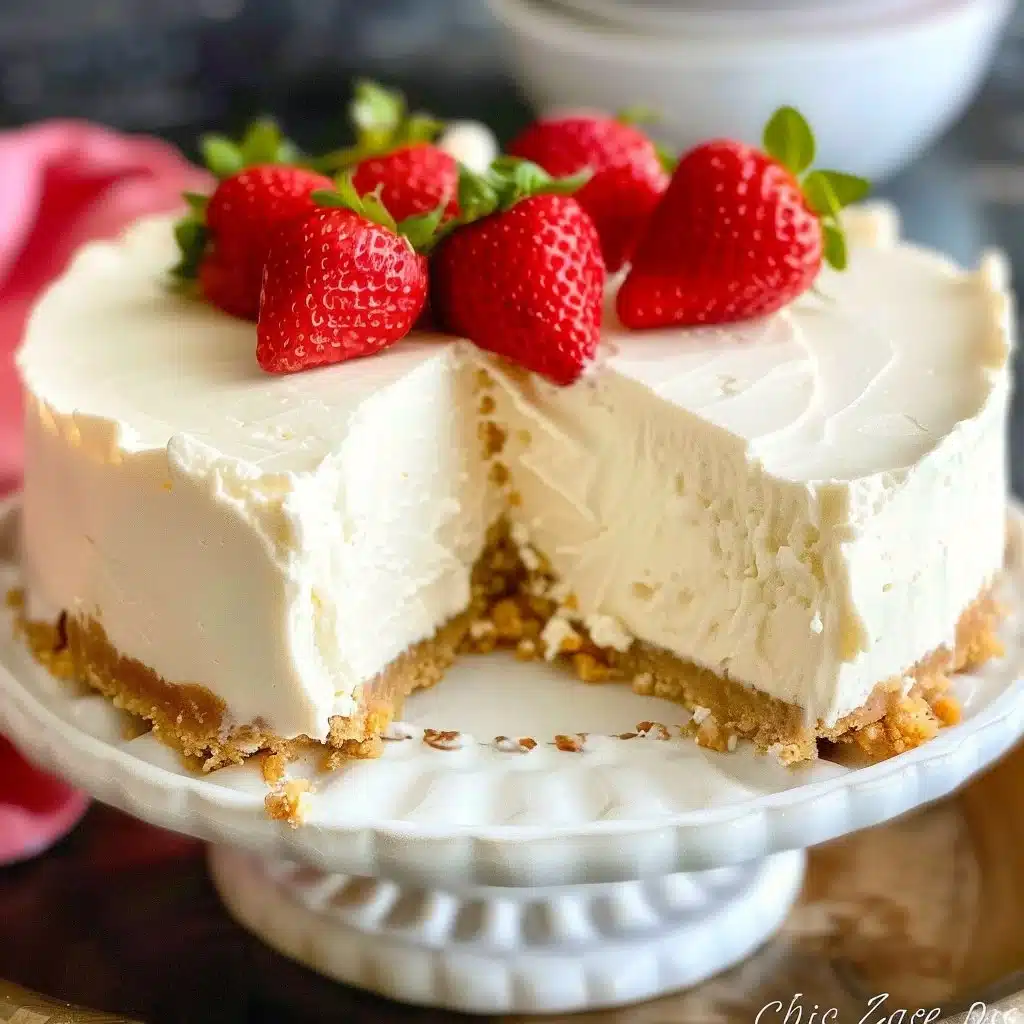
No one can resist a creamy, delicious cheesecake, especially when it requires no baking at all. This No Bake Cheesecake is a delightful treat that’s perfect for any occasion. Whether it’s a family gathering, a holiday celebration, or just a sweet craving after dinner, this easy dessert satisfies everyone. It’s a simple recipe that brings big flavor without all the fuss of baking. Trust me, once you give this a try, you’ll find yourself making it time and again.
Why Make This Recipe
You’ll love this No Bake Cheesecake for several reasons. First, it’s incredibly easy to make, requiring just a handful of ingredients and minimal prep time. This dessert makes for an excellent choice when you want something special without spending hours in the kitchen.
It’s perfect for gatherings, summer barbecues, or simply a sweet treat at home when you need to impress. Begin your cheesecake journey, and you’ll see how family and guests will rave about it.
“This recipe turned out even better than I expected. It’s simple, but the flavor is amazing.”
How to Make No Bake Cheesecake
This No Bake Cheesecake comes together in a few simple steps. You’ll start by preparing the crust, then create the creamy filling. Finally, allow it to chill and set in the fridge. That’s it! Let’s dive into how to make it.
Ingredients
What you’ll need
- 1 cup graham cracker crumbs
- 1/2 cup unsalted butter, melted
- 2 cups cream cheese, softened
- 1 cup powdered sugar
- 1 teaspoon vanilla extract
- 1 cup heavy whipping cream
Helpful Notes:
- Substitutions: You can use digestive biscuits instead of graham crackers for the crust.
- Quality Tips: Choose high-quality cream cheese for a richer flavor.
- Why the Ingredient Matters: The heavy cream gives the cheesecake its light and fluffy texture.
- Optional Add-ins: Add fresh fruit, chocolate, or caramel for unique flavor options.
Directions
Step-by-step instructions
- In a bowl, mix the graham cracker crumbs and melted butter until well combined. Press the mixture firmly into the bottom of a 9-inch springform pan.
- In another bowl, beat the cream cheese until smooth. Gradually add in the powdered sugar and vanilla, mixing until everything is well incorporated.
- In a separate bowl, whip the heavy cream until stiff peaks form. Carefully fold this whipped cream into the cream cheese mixture until combined.
- Pour the cream cheese mixture over the crust in the springform pan, smoothing the top.
- Refrigerate for at least 4 hours or until set.
- Serve chilled and enjoy!
How to Serve No Bake Cheesecake
There are many delicious ways to enjoy No Bake Cheesecake. You can top it with fresh berries, chocolate sauce, or caramel drizzle.
For a more festive touch, consider adding whipped cream on top or even sprinkles for cake-loving kids. This cheesecake pairs beautifully with a cup of coffee or tea and makes for a great dessert after any meal.
Storage Tips
How to store leftovers
To keep your No Bake Cheesecake fresh, store it in the refrigerator. It will last for about 3 to 5 days.
If you can’t finish it all, you can freeze it for later. Wrap it tightly in plastic wrap or foil, and it should keep well for up to 2 months. To enjoy, simply thaw it in the fridge overnight.
Helpful Tips
Helpful cooking tips
- Common Mistakes to Avoid: Make sure your cream cheese is at room temperature to avoid lumps in the filling.
- Texture Control Advice: Whip the heavy cream just until stiff peaks form; overwhipping may lead to a grainy texture.
- Flavor Balancing Tips: Adjust the sweetness by reducing or increasing the powdered sugar based on your taste.
- Time-Saving Shortcuts: You can make the cheesecake a day in advance, which helps the flavors meld beautifully.
Variations
Creative twists
- Flavor Variations: Try adding lemon juice or zest for a refreshing lemon cheesecake.
- Dietary Swaps: Use gluten-free graham crackers for a gluten-free version.
- Regional Spins: Incorporate spices like cinnamon or nutmeg for a pumpkin-flavored cheesecake in the fall.
- Ingredient Swaps: Substitute Greek yogurt for half of the cream cheese for a lighter version.
FAQs
Your questions answered
Can I make it ahead?
Absolutely! This cheesecake tastes even better after a day or two in the fridge.
Can I freeze it?
Yes, you can freeze it. Just wrap it properly to avoid freezer burn.
Can I substitute an ingredient?
Sure! You can use low-fat cream cheese or an alternative crust if you prefer.
Why did mine turn out dry/wet?
If it’s dry, you might have over-whipped the filling. If wet, ensure it chilled long enough.
How long does it last?
Stored in the fridge, it lasts about 3 to 5 days.
Last bite
This No Bake Cheesecake is a must-try for any occasion. Its ease of preparation and creamy texture make it a delightful treat everyone will love. Give it a go and share it with friends and family – they will appreciate it! Don’t forget to save or customize this recipe to fit your taste. Enjoy your cheesecake journey!
PrintNo Bake Cheesecake

A creamy and delicious no bake cheesecake that is simple to make and perfect for any occasion.
- Prep Time: 15 minutes
- Cook Time: 0 minutes
- Total Time: 240 minutes
- Yield: 8 servings
- Category: Dessert
- Method: Chilling
- Cuisine: American
- Diet: Vegetarian
Ingredients
- 1 cup graham cracker crumbs
- 1/2 cup unsalted butter, melted
- 2 cups cream cheese, softened
- 1 cup powdered sugar
- 1 teaspoon vanilla extract
- 1 cup heavy whipping cream
Instructions
- Mix the graham cracker crumbs and melted butter until well combined. Press the mixture firmly into the bottom of a 9-inch springform pan.
- Beat the cream cheese in another bowl until smooth. Gradually add in the powdered sugar and vanilla, mixing until well incorporated.
- Whip the heavy cream until stiff peaks form in a separate bowl. Carefully fold this whipped cream into the cream cheese mixture until combined.
- Pour the cream cheese mixture over the crust in the springform pan, smoothing the top.
- Refrigerate for at least 240 minutes or until set.
- Serve chilled and enjoy!
Notes
For a unique flavor, consider adding fresh fruit, chocolate, or caramel on top before serving. Store leftovers in the refrigerator for 3 to 5 days or freeze for up to 2 months.