
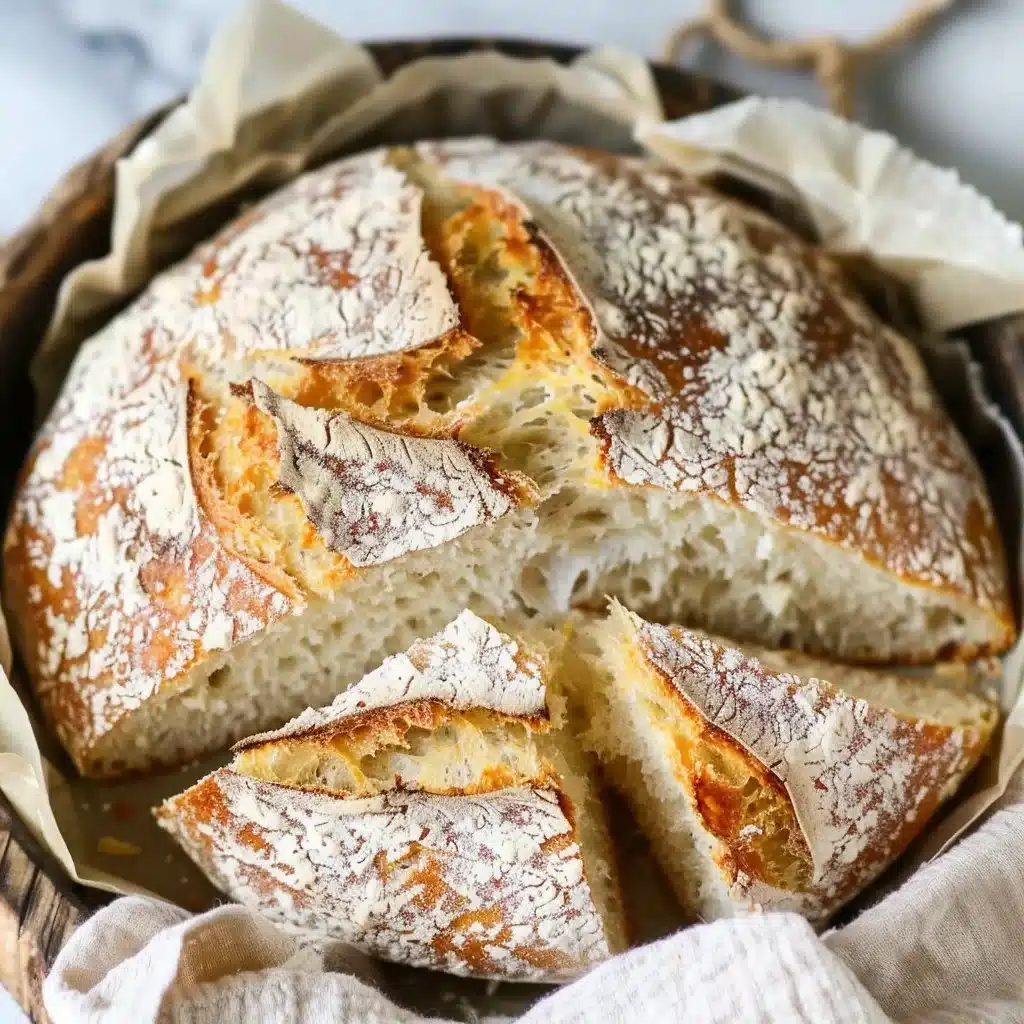
There’s something incredibly comforting about a kitchen filled with the warm, yeasty aroma of baking bread. Making Rustic French Bread brings back memories of family gatherings and long-awaited Sunday brunches. With its crusty exterior and soft, chewy inside, this bread is not just food; it’s an experience. Whether you’re enjoying it with a hearty soup, slathered with butter, or as the base for a delicious sandwich, baking this bread at home is completely worth the effort.
Why Make This Recipe
You will love crafting this Rustic French Bread because it is straightforward and rewarding. The simple ingredients come together to create a delightful bread perfect for any occasion. This recipe is great for weeknight dinners, family gatherings, or even holiday celebrations. It’s ideal for bakers of all skill levels, from beginners to those looking to sharpen their bread-making skills.
“This recipe turned out even better than I expected. It’s simple, but the flavor is amazing.”
How to Make Rustic French Bread
Before diving into the details, let’s outline what to expect. This bread-making process includes mixing the ingredients, allowing the dough to rise, shaping, and finally baking in a preheated oven. You’ll achieve a delicious loaf of Rustic French Bread that you can share with friends or enjoy all by yourself!
Ingredients
Gather these items for your Rustic French Bread:
- 3 1/4 cups all-purpose flour
- 1 tsp sugar
- 1 tsp salt
- 1 1/2 tsp active dry yeast
- 1 1/4 cups water (105 – 115 degrees)
Notes on Ingredients:
- Substitutions: You can use bread flour for a chewier texture.
- Quality Tips: Use fresh yeast for best results.
- Why the Ingredient Matters: Each component plays a role in the dough’s structure and flavor.
- Optional Add-ins: Consider adding herbs or garlic for an extra kick.
Directions
Follow these simple steps to make your Rustic French Bread:
- In the bowl of your stand mixer, mix the yeast, warm water, and sugar. Let sit for about 5 minutes to activate the yeast.
- Add half of the flour and salt to the yeast mixture. Fit your mixer with the dough hook and knead at medium-low speed.
- Gradually incorporate the remaining flour, kneading until the dough comes together. It will be sticky at this point.
- Transfer the dough to a lightly floured bowl and cover it with a clean towel. Let it rise for 2 hours.
- Lightly flour a piece of parchment paper or a cutting board. Gently form the dough into a smooth ball. Sprinkle more flour on top and cover it with a large bowl to rise for another 30 minutes.
- Preheat your oven to 425°F. Place a Dutch oven with its lid in the oven to preheat for 20 minutes. If you don’t have a Dutch oven, use a baking sheet but don’t preheat the sheet.
- Use a very sharp knife to score the top of the bread. Carefully transfer the dough using the parchment paper into the hot Dutch oven.
- Bake the bread with the lid on for 30 minutes. Remove the lid and bake for another 10 minutes until the top is golden brown. If using a baking sheet, bake for 35 minutes. The internal temperature should reach about 210°F.
- Remove the bread from the oven and carefully place it on a cooling rack. Once cooled, slice and serve! Store in a storage bag or a container on the counter for 3-5 days.
How to Serve Rustic French Bread
There are so many great ways to enjoy this Rustic French Bread. Pair it alongside a warm bowl of soup, or enjoy it with herbed butter or olive oil for dipping. It makes a fantastic base for sandwiches, especially with savory fillings.
Consider these serving suggestions:
- Serve with a fresh garden salad.
- Pair it with roasted vegetables.
- Enjoy it as part of a cheese platter.
Storage Tips
To keep your Rustic French Bread fresh, follow these tips:
- Room Temperature: Store bread in a storage bag or container on the counter for up to 3-5 days.
- Freezing: You can freeze the bread for later. Wrap it tightly in foil or plastic wrap for up to 3 months.
- Reheating: To refresh day-old bread, warm it in a preheated oven for about 10 minutes.
Always use safe food storage methods to prevent spoilage.
Helpful Tips
Here are a few extra tips for making the best Rustic French Bread:
- Avoid over-kneading the dough, or it may become tough.
- If the dough seems too dry, add a little water. If it’s too wet, dust with flour.
- You can get creative by adding spices like rosemary or thyme for a flavor twist.
Variations
Want to switch things up? Here are some creative twists to try:
- Herb Variations: Incorporate dried herbs like basil or oregano.
- Garlic Bread: Add minced garlic for a delicious twist.
- Whole Wheat: Substitute some all-purpose flour with whole wheat flour for a healthier option.
FAQs
Can I make it ahead?
Yes! You can prepare the dough and let it rise the day before. Just cover and refrigerate until you’re ready to bake.
Can I freeze it?
Absolutely. Freeze your bread when it’s completely cooled for later enjoyment.
Can I substitute an ingredient?
Yes, you can use different flours or sugars based on your preference.
Why did mine turn out dry/wet?
This can happen if you mismeasure the flour or water. Ensure you’re using the exact amounts.
How long does it last?
Homemade bread is best consumed within 3-5 days, but it can be frozen for up to 3 months.
Final Thoughts
Making Rustic French Bread isn’t just a cooking task; it’s a joyful experience that fills your home with a wonderful aroma. The taste is just as delightful as the process. Try your hand at this homemade bread today, and don’t hesitate to get creative with flavors or serving styles. Happy baking!
PrintRustic French Bread

A straightforward and rewarding recipe for crusty Rustic French Bread that’s perfect for any occasion.
- Prep Time: 15 minutes
- Cook Time: 40 minutes
- Total Time: 55 minutes
- Yield: 1 loaf
- Category: Bread
- Method: Baking
- Cuisine: French
- Diet: Vegetarian
Ingredients
- 3 1/4 cups all-purpose flour
- 1 tsp sugar
- 1 tsp salt
- 1 1/2 tsp active dry yeast
- 1 1/4 cups water (105 – 115°F)
Instructions
- Mix the yeast, warm water, and sugar in the bowl of your stand mixer. Let sit for about 5 minutes.
- Add half of the flour and salt to the yeast mixture and knead at medium-low speed.
- Gradually incorporate the remaining flour, kneading until the dough comes together; it will be sticky.
- Transfer the dough to a lightly floured bowl and cover it with a clean towel. Let it rise for 2 hours.
- Lightly flour a piece of parchment paper or cutting board. Gently form the dough into a smooth ball and let it rise for another 30 minutes.
- Preheat your oven to 425°F, placing a Dutch oven with its lid inside to preheat for 20 minutes.
- Score the top of the bread with a sharp knife, then carefully transfer it into the hot Dutch oven.
- Bake the bread with the lid on for 30 minutes; then remove the lid and bake for another 10 minutes until golden brown.
- Remove the bread from the oven and place it on a cooling rack. Slice and serve once cooled.
Notes
For best results, use fresh yeast. This bread can be served with soups, herbed butter, or as a base for sandwiches.