
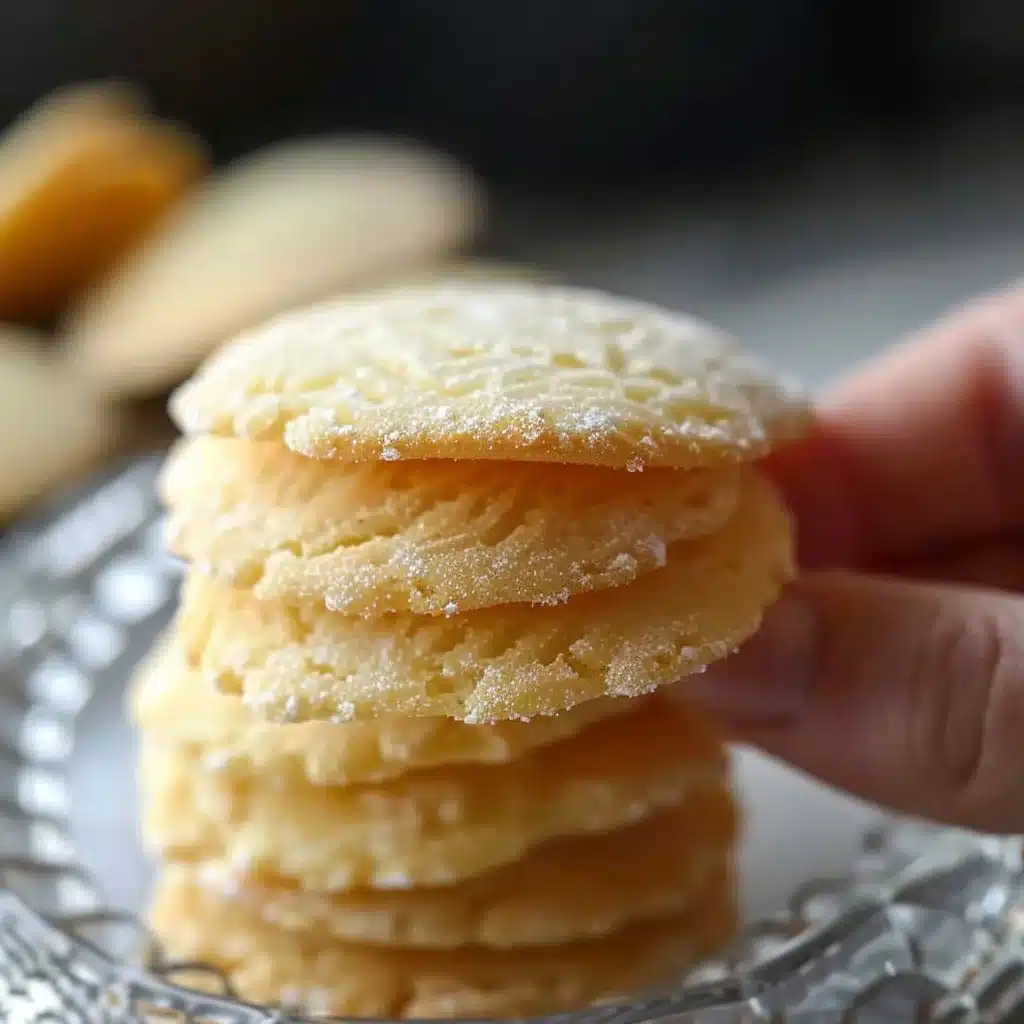
Homemade vanilla wafers are a delightful treat that can take you back to childhood. There’s something special about biting into those crisp, slightly sweet cookies. Whether you’re enjoying them with a glass of milk after school or using them as a base for your favorite dessert, these wafers always hit the spot. They’re simple enough for an afternoon bake or perfect for special occasions. Once you try this recipe, you’ll wonder why you ever thought about buying store-bought.
Reasons to Make It at Home
You’ll love making homemade vanilla wafers because they are straightforward and rewarding. This easy recipe requires basic ingredients you probably already have in your pantry. They’re perfect for a weeknight treat or as a charming addition to brunch. Plus, these cookies are fantastic for busy parents needing a quick snack for their kids or for anyone looking to impress guests with minimal effort.
“This recipe turned out even better than I expected. It’s simple, but the flavor is amazing.”
The Cooking Process Explained
Making these homemade vanilla wafers is a breeze. You’ll start by creaming the butter and sugar, then mix in the eggs and vanilla. After that, combine the dry ingredients and fold them into the mixture. Once your batter is ready, just scoop it onto a baking sheet and let the oven do the rest. Soon, you’ll be greeted with the aroma of freshly baked cookies.
What You’ll Need
To make these tasty homemade vanilla wafers, gather these items:
- 1 cup unsalted butter, softened
- 1 cup granulated sugar
- 2 large eggs
- 1 teaspoon vanilla extract
- 2 cups all-purpose flour
- 1 teaspoon baking powder
- 1/2 teaspoon salt
Helpful Notes:
- Substitutions: You can use margarine instead of butter if needed.
- Quality tips: Always use fresh eggs and high-quality vanilla for the best flavor.
- Optional add-ins: Consider mixing in chocolate chips or nuts for variety.
Step-by-Step Instructions
- Preheat your oven to 350°F (175°C).
- In a bowl, cream together the softened butter and granulated sugar until it’s light and fluffy.
- Beat in the eggs one at a time, making sure to mix well after each addition. Stir in the vanilla extract.
- In another bowl, whisk together the flour, baking powder, and salt. Gradually mix this dry mixture into the wet ingredients until just combined.
- Drop spoonfuls of the batter onto a prepared baking sheet, leaving about 2 inches between each.
- Bake for 10-12 minutes or until the edges turn golden brown.
- Allow the cookies to cool completely before serving or using them as a crust for desserts.
Best Ways to Enjoy It
These homemade vanilla wafers are delicious on their own, but you can elevate their enjoyment by pairing them with:
- A scoop of ice cream for an easy dessert.
- Fresh fruits like strawberries or bananas.
- Dipping them in chocolate for a sweet twist.
- Crumbling them over yogurt or pudding for added texture.
They’re great for casual snacking or special occasions alike!
Storage and Reheating Tips
To keep your homemade vanilla wafers fresh:
- Refrigerator storage: Store them in an airtight container at room temperature for up to one week.
- Freezer guidance: You can freeze them for up to three months. Place them in a single layer in a freezer-safe bag.
- Reheating method: Let them come to room temperature. If you like them warm, pop them in the microwave for a few seconds.
- Food safety note: Make sure the cookies are completely cooled before storing to avoid moisture.
Pro Tips for Best Results
Here are some handy tips to ensure your homemade vanilla wafers come out perfect:
- Avoid overmixing the batter; it should be just combined for the best texture.
- If your cookies are turning out dry, check your oven temperature with an oven thermometer to ensure accuracy.
- For a softer cookie, use a slightly less flour.
- Save time by using a cookie scoop for uniform shapes.
Creative Twists
Feel free to switch things up with these variations:
- Flavor variations: Try almond extract for a different twist.
- Dietary swaps: Use gluten-free flour to make a gluten-free version.
- Regional spins: Add some lemon zest for a bright, citrusy flavor.
Common Questions
Can I make it ahead?
Yes! You can prepare the dough ahead of time and store it in the fridge for a day or two.
Can I freeze it?
Absolutely! These cookies freeze well. Just place them in an airtight container.
Can I substitute an ingredient?
Yes! If you’re out of eggs, you can use a flax egg as a substitute.
Why did mine turn out dry/wet?
Dry cookies may be due to too much flour or overbaking. Wet ones could be caused by not measuring accurately.
How long does it last?
Homemade vanilla wafers stay fresh for about a week when stored properly at room temperature.
Last Bite
Making homemade vanilla wafers is a delightful experience. They are not only easy to prepare but so rewarding. Whether you enjoy them right away or save some for later, these cookies are sure to become a favorite treat. Give this recipe a try and enjoy the sweetness of homemade vanilla wafers!
PrintHomemade Vanilla Wafers

Delightful homemade vanilla wafers that are crisp and slightly sweet, perfect for snacking or desserts.
- Prep Time: 10 minutes
- Cook Time: 12 minutes
- Total Time: 22 minutes
- Yield: 24 cookies
- Category: Dessert
- Method: Baking
- Cuisine: American
- Diet: Vegetarian
Ingredients
- 1 cup unsalted butter, softened
- 1 cup granulated sugar
- 2 large eggs
- 1 teaspoon vanilla extract
- 2 cups all-purpose flour
- 1 teaspoon baking powder
- 1/2 teaspoon salt
Instructions
- Preheat your oven to 350°F (175°C).
- Cream together the softened butter and granulated sugar until it’s light and fluffy.
- Beat in the eggs one at a time, making sure to mix well after each addition. Stir in the vanilla extract.
- Whisk together the flour, baking powder, and salt in another bowl. Gradually mix this dry mixture into the wet ingredients until just combined.
- Drop spoonfuls of the batter onto a prepared baking sheet, leaving about 2 inches between each.
- Bake for 10-12 minutes or until the edges turn golden brown.
- Allow the cookies to cool completely before serving or using them as a crust for desserts.
Notes
For best results, avoid overmixing the batter. Store cookies in an airtight container for freshness.