
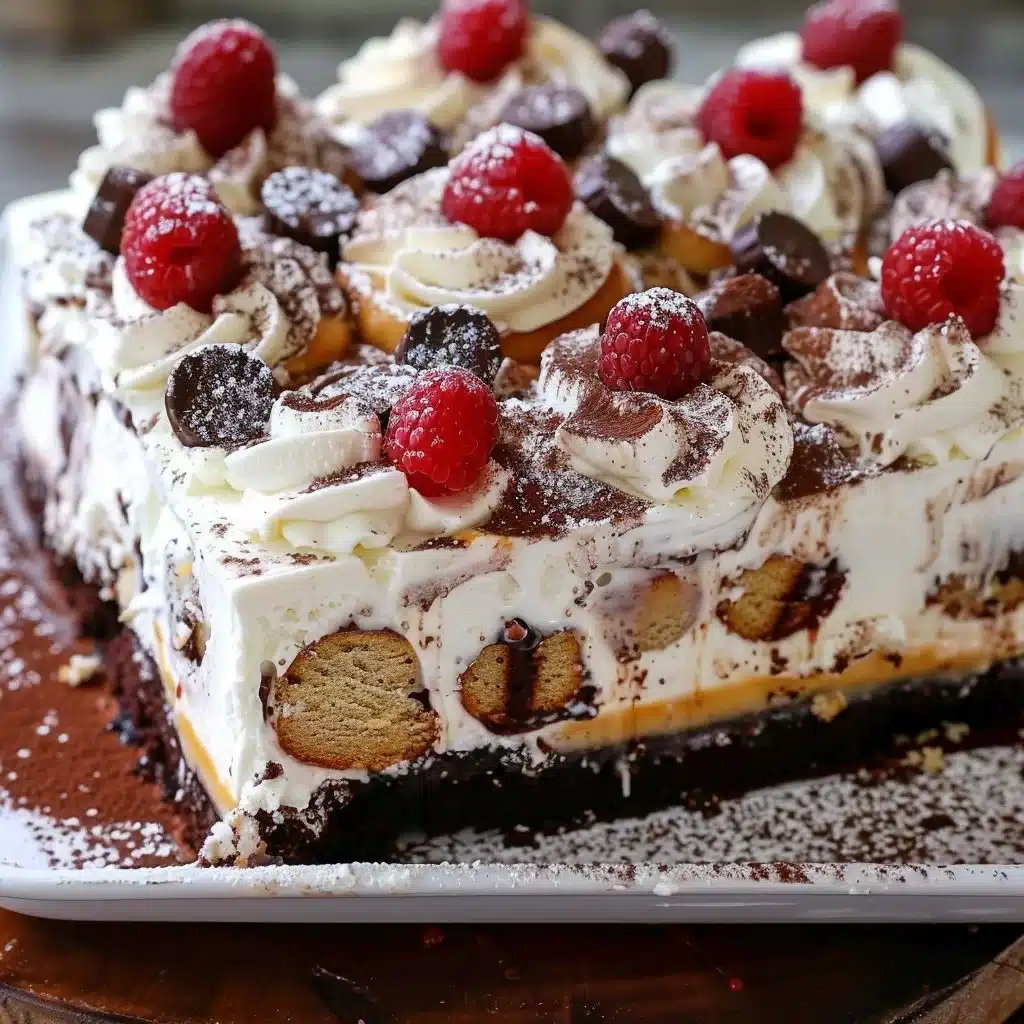
This Easy Ice Cream Cake recipe is perfect for hot summer days or any time you crave something sweet and refreshing. It brings back memories of birthday parties and family gatherings where it’s often the star of the dessert table. Using a simple brownie mix and your favorite ice cream flavor, you can whip up this delightful dessert quickly. It’s a fun way to treat your loved ones, and the customizable toppings let everyone add their personal touch. You’ll love how simple yet satisfying it is!
Why you’ll love this
This Easy Ice Cream Cake stands out because it’s incredibly easy to make, and it never fails to impress. With just a few ingredients and minimal prep time, you’ll have a tasty dessert ready for any occasion. It’s perfect for weekend get-togethers, summer barbecues, or even a treat after a long day. Families with kids or busy parents will find this recipe fun and manageable.
“This recipe turned out even better than I expected. It’s simple, but the flavor is amazing.”
How it comes together
Making this Easy Ice Cream Cake is a breeze! You’ll start by baking brownies, then layer them with your favorite ice cream. The layers create a beautiful and delicious dessert. The best part? You can customize it with all sorts of toppings before serving! Just make sure to allow enough time for it to freeze solid—that’s key to a perfect slice.
What you’ll need
- 1 package brownie mix
- Ingredients to prepare brownies (eggs, oil, water)
- 1 quart of ice cream (any flavor)
- Whipped cream
- Assorted toppings (sprinkles, chocolate sauce, fruits)
Helpful Notes:
- Substitutions: Any brownie mix will work, and feel free to use dairy-free ice cream for a vegan option!
- Quality Tips: Choose a rich, creamy ice cream for the best taste.
- Optional Add-Ins: Consider adding nuts or crushed cookies between layers for extra texture.
Step-by-step instructions
- Preheat your oven according to the brownie mix package instructions. Prepare the brownie batter as directed, then bake it in a rectangular dish until done. Let it cool completely.
- Once cooled, spread a layer of ice cream over the brownie base.
- For extra indulgence, you can add another layer of brownies and another layer of ice cream.
- Keep repeating the layers until you’ve used all of your ingredients, finishing with that delicious ice cream on top.
- Cover and freeze the cake for at least 4 hours to firm up.
- Before serving, add a generous layer of whipped cream and sprinkle assorted toppings on top.
Best ways to enjoy it
This Easy Ice Cream Cake is delightful on its own, but you can elevate the experience with a few simple touches. Serve it with a warm chocolate sauce or a drizzle of caramel. Pair it with fresh fruit for a refreshing balance. It’s a great treat for birthday celebrations or simply enjoying a sunny day.
Storage Tips
To keep your cake fresh, store it in the freezer. It’s best consumed within a week, but it will last longer if frozen properly. If you have leftovers, wrap them well to prevent freezer burn. For serving, allow it to sit at room temperature for a few minutes before cutting to achieve cleaner slices.
Helpful cooking tips
- Common mistakes to avoid: Make sure your brownie base is completely cooled to prevent the ice cream from melting.
- Texture control advice: Let your ice cream soften slightly before layering for easier spreading.
- Flavor balancing tips: Choose toppings that contrast nicely with the sweet ice cream and brownies.
- Time-saving shortcuts: You can make the brownies a day ahead and assemble the cake the next day.
Creative twists
There are many ways to customize this Easy Ice Cream Cake! Try different ice cream flavors like mint chocolate chip or cookies and cream. You can also swap the brownie base for chocolate cake or even a cookie layer. Experiment with different toppings to create unique flavor combinations!
Common questions
Can I make it ahead?
Yes, you can prepare this cake a day or two in advance. Just keep it frozen until serving.
Can I freeze it?
Absolutely! Freezing is necessary to set the cake properly.
Can I substitute an ingredient?
Sure! Feel free to use gluten-free brownie mixes or non-dairy ice cream to suit your dietary needs.
Why did mine turn out dry/wet?
If it’s dry, the brownies may have overbaked. If it’s wet, the brownie layer might not have cooled enough before adding ice cream.
How long does it last?
This cake will stay good in the freezer for about 1-2 weeks, as long as it’s tightly wrapped.
Final thoughts
Making this Easy Ice Cream Cake is not only simple but also a delightful way to bring everyone together. Whether it’s for a special celebration or just a treat for yourself, this recipe is worth trying. Customize it however you’d like and enjoy every bite!
PrintEasy Ice Cream Cake
This Easy Ice Cream Cake is a refreshing dessert perfect for summer, made with brownie layers and your favorite ice cream flavors.
- Prep Time: 15 minutes
- Cook Time: 30 minutes
- Total Time: 270 minutes
- Yield: 8 servings
- Category: Dessert
- Method: Layering
- Cuisine: American
- Diet: Vegetarian
Ingredients
- 1 package brownie mix
- Ingredients to prepare brownies (eggs, oil, water)
- 1 quart of ice cream (any flavor)
- Whipped cream
- Assorted toppings (sprinkles, chocolate sauce, fruits)
Instructions
- Preheat your oven according to the brownie mix package instructions. Prepare the brownie batter as directed, then bake it in a rectangular dish until done. Let it cool completely.
- Spread a layer of ice cream over the brownie base.
- Add another layer of brownies and another layer of ice cream for extra indulgence.
- Continue layering until all ingredients are used, finishing with ice cream on top.
- Cover and freeze the cake for at least 240 minutes to firm up.
- Add a generous layer of whipped cream and sprinkle assorted toppings on top before serving.
Notes
Common mistakes to avoid: Ensure the brownie base is completely cooled to prevent melting the ice cream.